
Want to know how tos etup Google Serach Console (GSC)? then you are in right place
Google Search is also known as GSC, where we can check URL’s, indexing, Crawling and required metrics of our website.
🔧 How to Set Up Google Search Console
- Go to GSC → Google Search Console
- Sign in with your Google account (ideally the same one linked to your website/Google Analytics).
- Add Property → You’ll see two options:
- Domain: Covers all URLs across subdomains & protocols (https, http, www, non-www). Best if you want full tracking.
- URL Prefix: Tracks only one version of your site (e.g.,
https://example.com). Easier if you want partial tracking.
- Verify Ownership:
- For Domain → Add a TXT record in your domain’s DNS (via your hosting or registrar, like GoDaddy, Namecheap, Cloudflare, etc.).
- For URL Prefix → Options include uploading an HTML file, adding a meta tag, using Google Analytics, or Google Tag Manager.
- Wait for Verification → May take a few minutes to 48 hours depending on DNS.
- Submit Your Sitemap (important for indexing):
- In GSC, go to Sitemaps.
- Enter your sitemap URL (usually
https://yourdomain.com/sitemap.xml). - Click Submit.
- Check Index Coverage & Performance → You’ll start seeing impressions, clicks, and indexing data after a few days.
For Step by step process with image scroll down below.
To setup a google search console follow the below steps to understand the process
Step 1 :
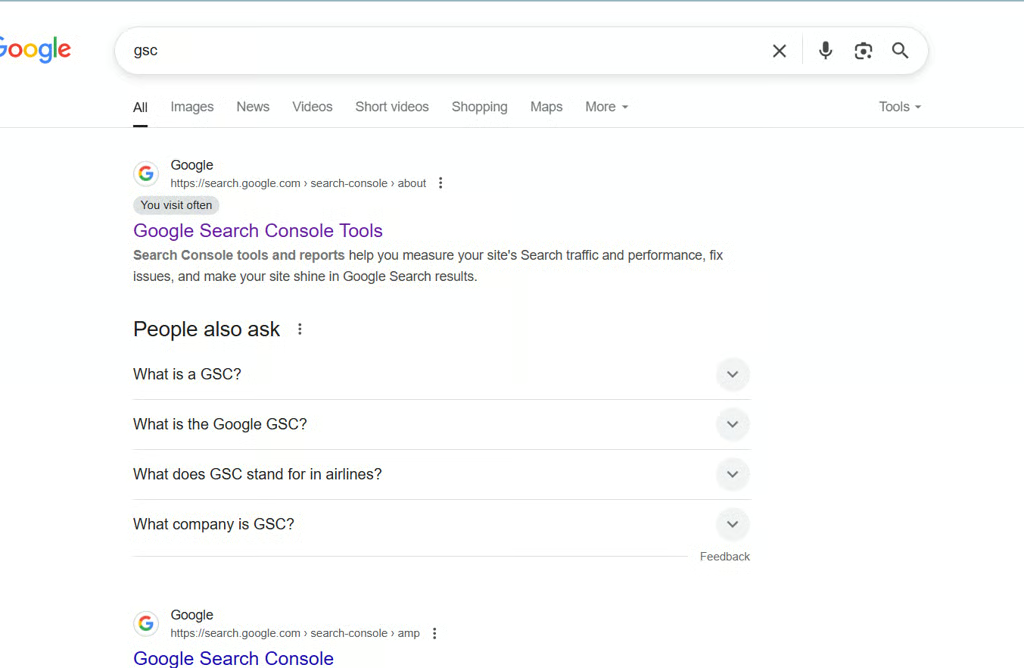
Open the google search and Type > Google Search Console or GSC, then open the first page that appears on the results like below,
now, After clicking on start now GSC will open like this,

Step 2 :
From the above 2 options you can select according to your preference,
1). Domain
If you select > Domain you have to give only domain name without https://www.
For Example : domain.com
After adding domain > CONTINUE
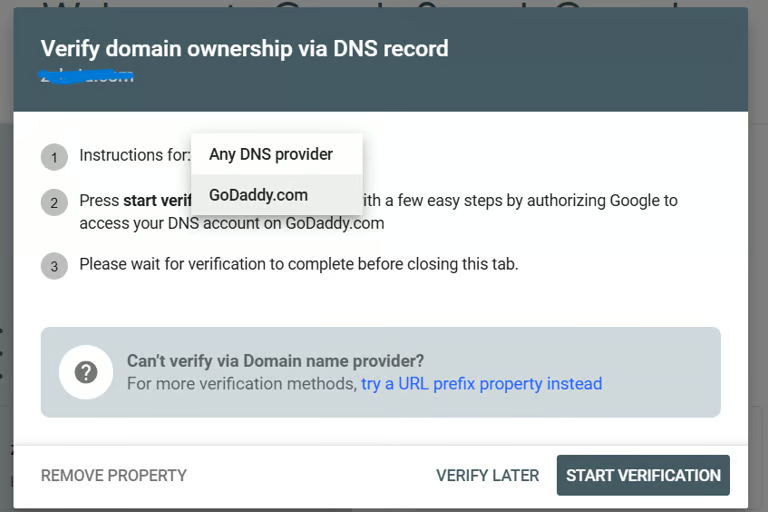
After that, it will appaer like this
Now if you go daddy hosting as a provider then you can directly can start verification easily with it, but if you go for manually or your hosting is different such as Hostinger, Dreamhost. Bluehost or anyother we will do like this from the below image

Under instructions drop menu, you select 1st option “Any DNS Provider” then you can click on START VERIFICATION. Then i will appear like this,
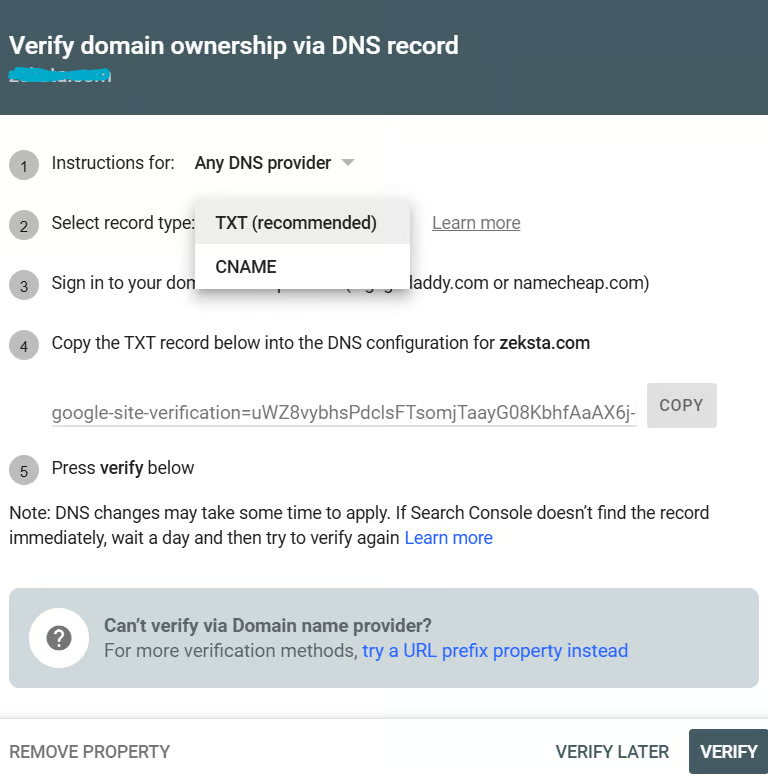
You can select the record type drop menu according to yours, then copy the text that was present in the 4th option. After copying go to the Hosting provider of your domain and then go to DNS Records to add.
(Hosting > DNS Server > Record )
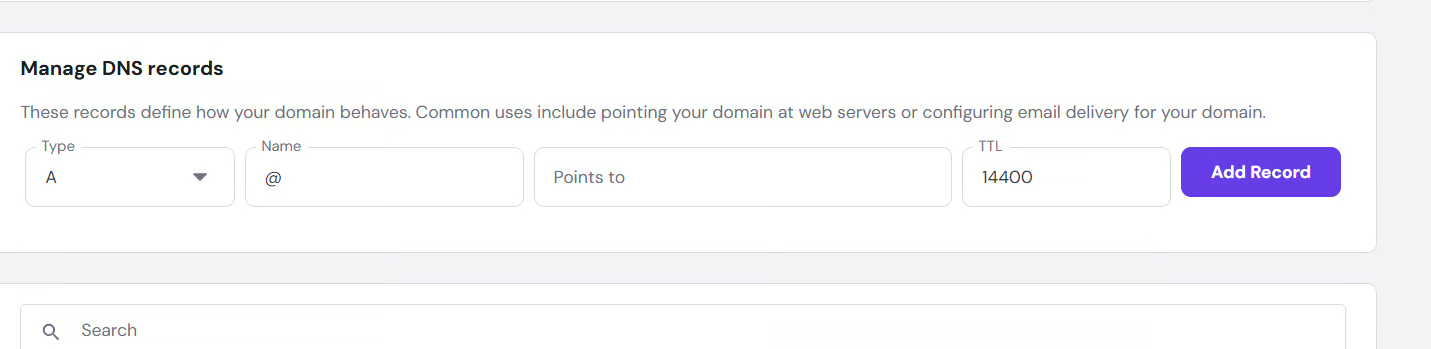
under the Type select the one you choose in the GSC and under the Point to section paste the text you copied from GSC, Don’t touch the remaining parts if you don’t know about it. Then click on ADD RECORD.
( TXT > @ > text you copied > 14400 > Add Record )
TTL stands for “Time To Live”
i.e., TTL of 14400 represents a Time To Live value of 14,400 seconds, which is equivalent to 4 hours.
After 4 hours will able to get GSC verification after clicking Verify pn GSC , but if you want you can change TTL